

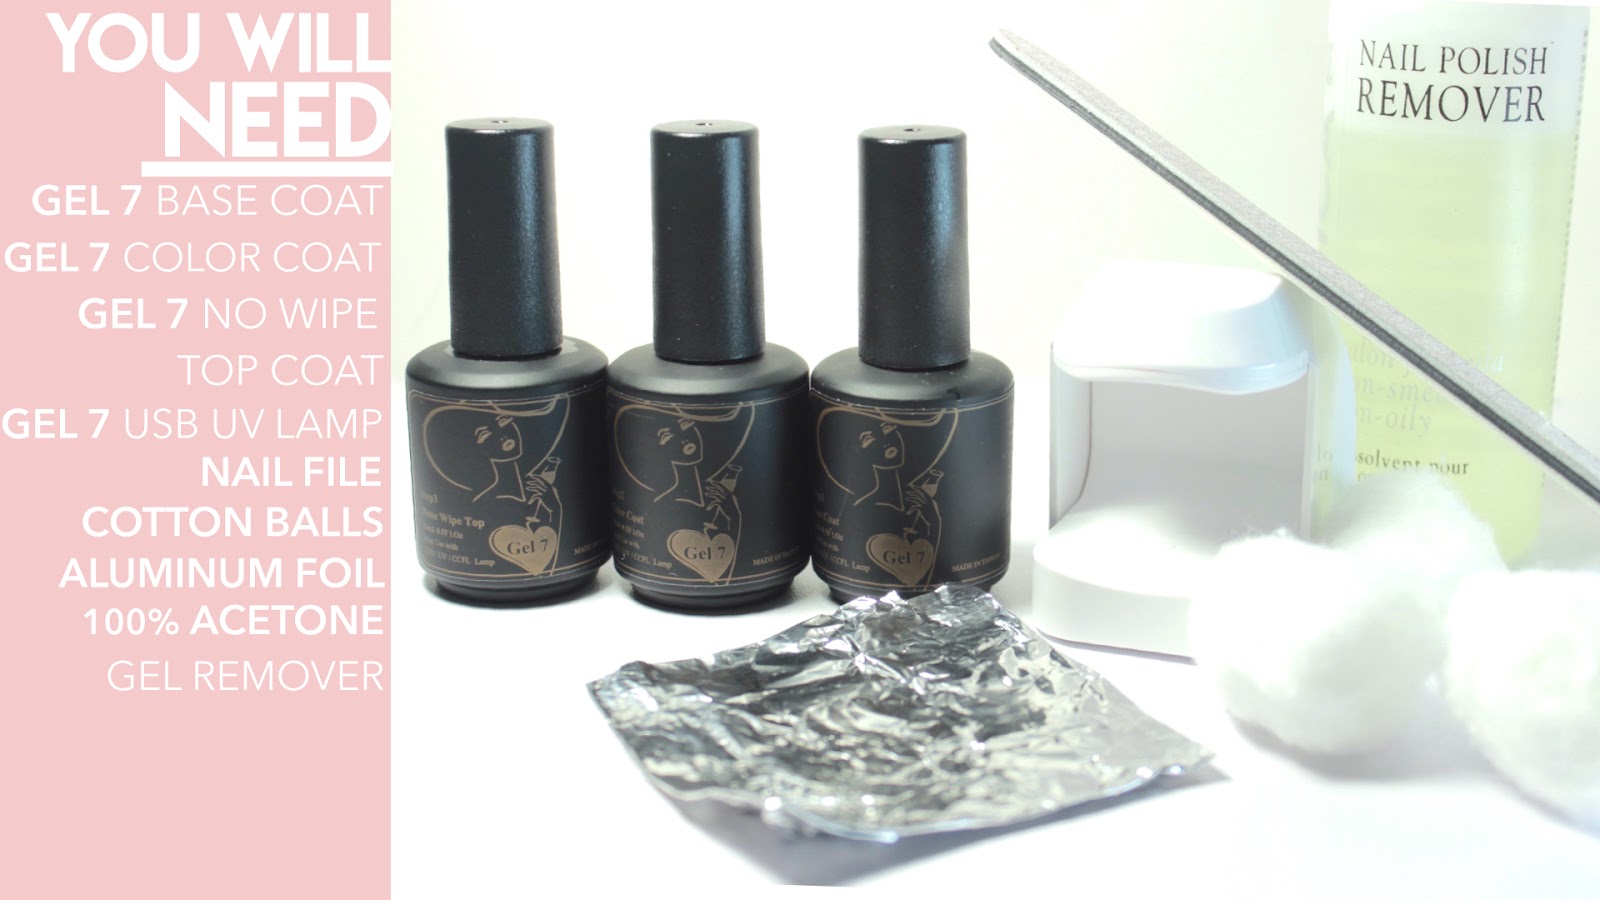
With the nail market booming of new innovative products, salons are soon to be a thing of the past. Today I will show you how to get a salon perfect gel manicure in the privacy of your home and how to remove it.
_________________________________________________________________________________

1. Prepare your nails. File the shape, buff out any ridges and clean the nails.
2. Apply your base coat. Aim for thin even coats and don't get to close to the skin.

3. Cure the base gel in an LED or UV lamp according to the manufacture instructions.
4. Now apply your color coat. Again, think thin, even coats. Try not to get TOO close to your skin.
If you're new to gel, try applying and curing the gel after each nail. This will prevent the gel from moving around before you can cure all of your nails.

4.5. If you do get gel on your skin, remove it before curing.
Failing to do so can give you a tingly sensation during the curing process.
5. Cure again.

6. If you need to, apply a second coat of your color gel.
Gel 7 can be completely opaque in one coat, but I did two thin ones just to be safe.
7. Again, cure accordingly.

8. Apply a top coat to bump up the shine!
I'm using a No Wipe Top Coat which means there will be no sticky layer to remove after curing!
9. Finish with one last cure.
_________________________________________________________________________________
When you're ready to remove your mani, follow these simple steps:

1.Break the seal of the top gel by gently filing.
Once the shine goes dull, you're good.
2.To protect the skin from the harsh acetone, apply some oil.

3. Saturate a cotton ball with 100% acetone or gel remover and cover the nail.
Then wrap a piece of foil around the cotton ball and tightly secure it.
You want to keep the acetone in contact with the gel.
4. Wait 15-20 minutes.
Check it when the times up. If the gel is still stuck, let it soak for an additional 5-10 minutes.

5. If your nails soaked long enough, the gel should be able to scrape right off with no pressure.
6. Restore the nail and surrounding skin with a hydrating oil.
That's it! Now just rinse and repeat for your new mani!
_________________________________________________________________________________
Products used in this tutorial were provided by Gel 7.
This is a very nice and easy hack. I LOVE IT AND HAVE SUBSCRIBED TO YOUR CHANNEL. Can u subscribe to me back and see my blog at www.nailartstash.blogspot.in
ReplyDeleteAnd
www.beautifulnailsmagic.blogspot.com